There are dozens of emulators on the market, offering users to experience the thrill of mobile games on PC! Among a host of projects of the same type, one startup stands out, to which we will devote all our attention in this article. Today we’ll talk about how to completely remove BlueStacks from your computer.
Using standard Windows features
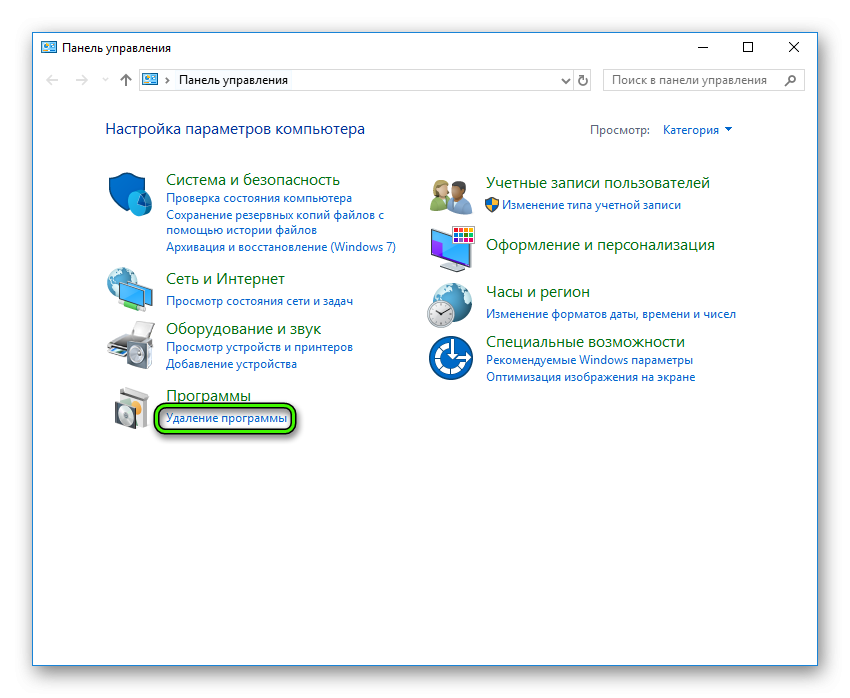
First, let’s look at the simplest way to remove the objectionable emulator from PC. Below is a step-by-step instruction on how to implement our plans:
- Via the Start menu or the command line, open the Control Panel.
- In the section “Programs” find the item “Uninstall a program”.
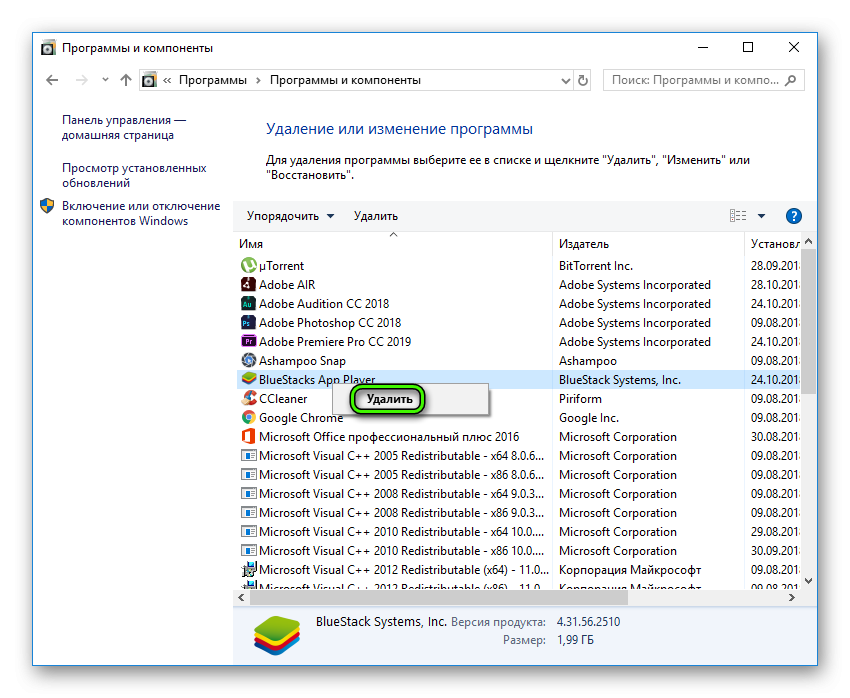
- In the window that opens, a list of all applications installed on the computer is presented. Click LMB to select BlueStacks App Player.
- At the top of the panel we find the button “Delete / Change”. If this button is not there, then right-click on the desired column and select it already there.
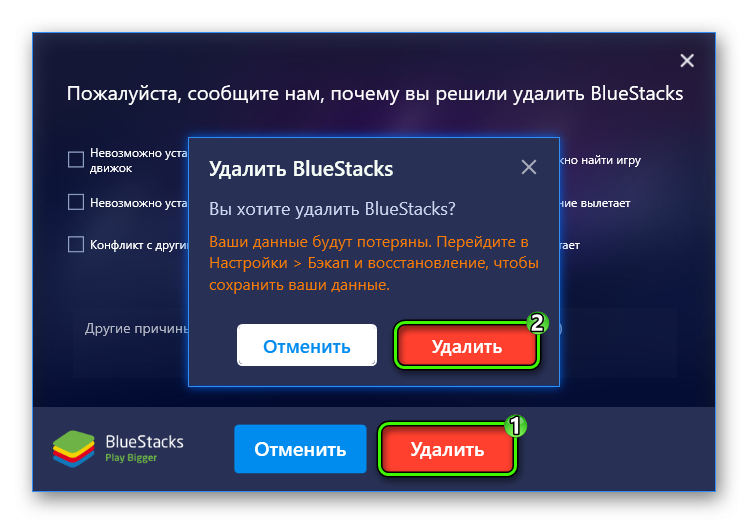
- Opens a window automatically “Uninstall”, where we confirm the seriousness of the intentions.
- Several messages will inform about the final removal, we agree and move on.
- Waiting for the uninstallation to complete.
Registry cleaning
For the correct removal of BlueStacks, you need to get rid of residual files, in a word – software garbage. To do this:
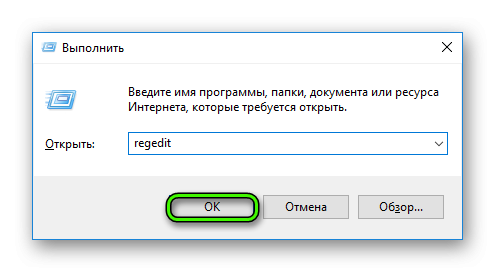
- Let’s use the combination Win + R.
- In the “Open” field, enter the command regedit.
- We see the editor window, where we need the “Edit” section .
- In the drop-down menu, select “Find…”. An alternative way to call it is the combination Ctrl + F.
- Enter a search query identical to the name of the remote emulator.
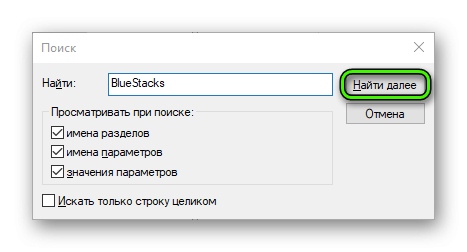
- Getting rid of keys that have the unfortunate name in their body.
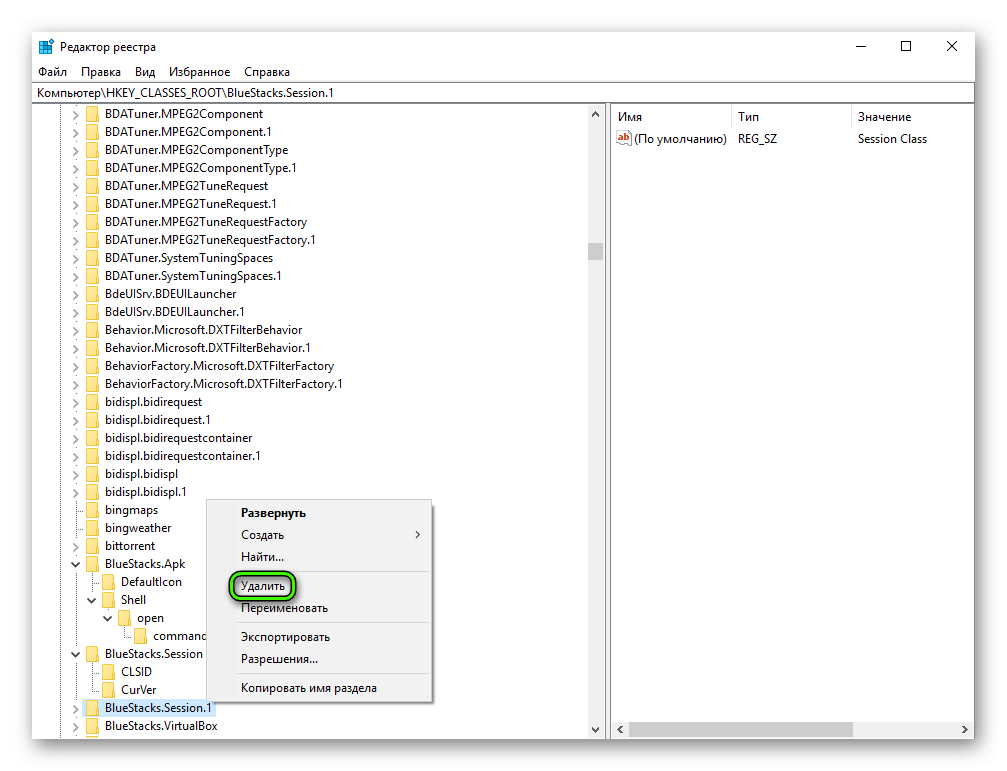 Press F3 to move on to the next one.
Polishing the file directories
The final step of the cleaning activities is wrapped up in the following set of step-by-step manuals:
- Press the key combination Win + E to open File Explorer.
- In the empty line “Search” enter the name of the emulator “BlueStacks”.
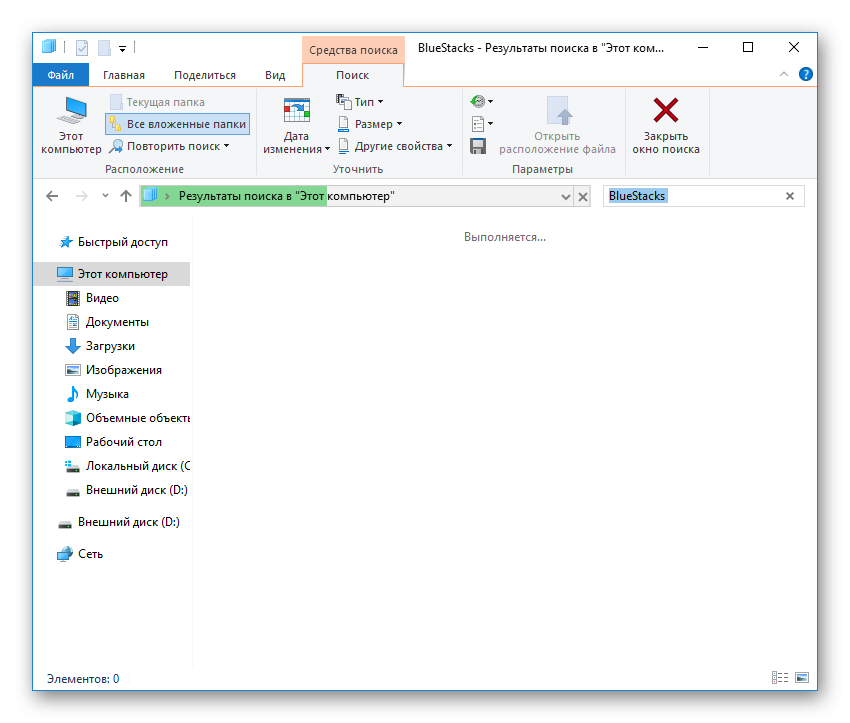
- The system, like a bloodhound, will find the remaining elements of the program.
- Remove them using standard Windows tools.
In this simple way, you can completely remove the application from your personal computer.
What the developers recommend
There are several options on the official website of the project to get rid of the residual BlueStacks files.Step-by-step instructions straight from the experts are presented below:
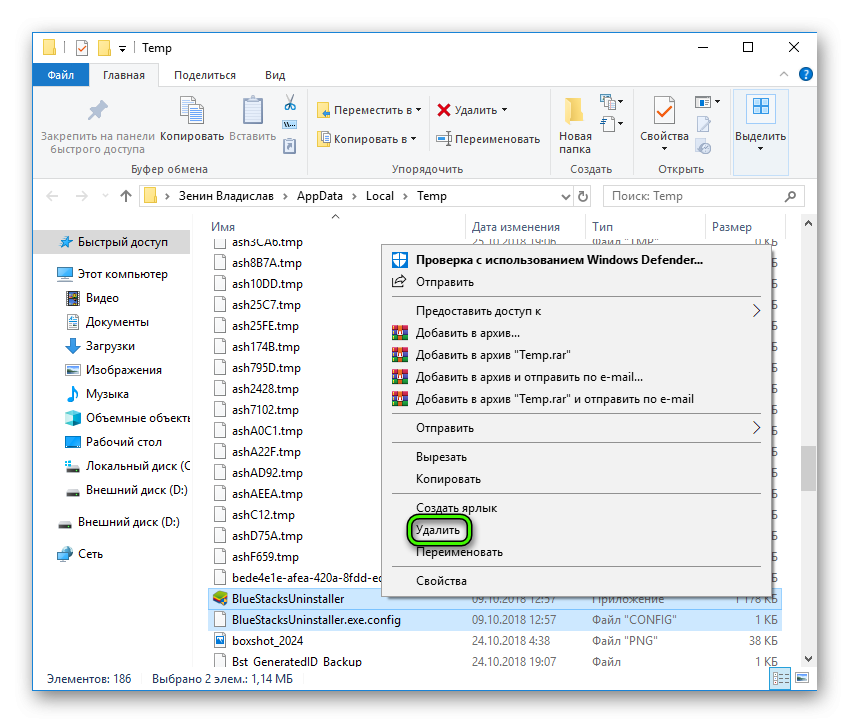
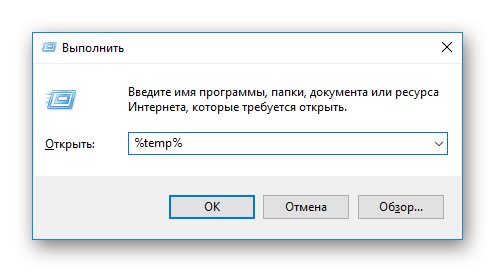
- Use the keyboard shortcut Win + R or open the command line in another way.
- In the free field, enter the command %temp%.
- All found files and folders containing the mention of the program name are subject to ruthless deletion.
Summarize
Complete removal of BlueStacks is an extremely simple task and does not require advanced PC knowledge from the user. It is enough to have a basic understanding of the mechanisms of the system and everything will work out!


БЛАГОДАРЮ. Вы очень помогли
здравствуйте, у меня вопрос, как удалить файлы типа “vdi” в папке Engine . С каждым заходом в BlueStacks размер файлы увеличивается на 300-500мб?
Дело стоит того. Интересно, что засевшая у меня реклама Fonbet, удалявшаяся на время с помощью советов и-нета, появлялась снова. Пока не убрал этот самый стэкс.