Activating superuser mode (root access) on Android gives the user extended access to the system. For example, previously hidden files become visible to him. And this is just one possibility from the general list. In some cases, enabling this feature is required on Android emulators, for example, on BlueStacks. But in this program it is not so easy to do everything. If you needed BlueStacks Root-rights, then be sure to check out our material.
Details
Not so long ago, the fourth numbered version of the emulator was released, and many users downloaded it to their computer or laptop. But there are also a lot of people who still prefer not to upgrade. That is why it makes sense to consider the procedure for activating the superuser mode for the old and new versions of the program.
But first, let’s look at the situation as a whole. Directly in the emulator, this possibility is not provided. This is due to the fact that the creators of BS are against piracy (installing paid applications without purchasing them on Android). And Root is very often used for these purposes. But there is a useful software BSTweaker from third-party developers that does an excellent job.
Instruction
Let’s figure out how to root BlueStacks 3 and subsequent versions of the emulator. First you need to download the tweaker archive and extract its contents to any folder. Next, open BlueStacksTweaker5.exe as an administrator.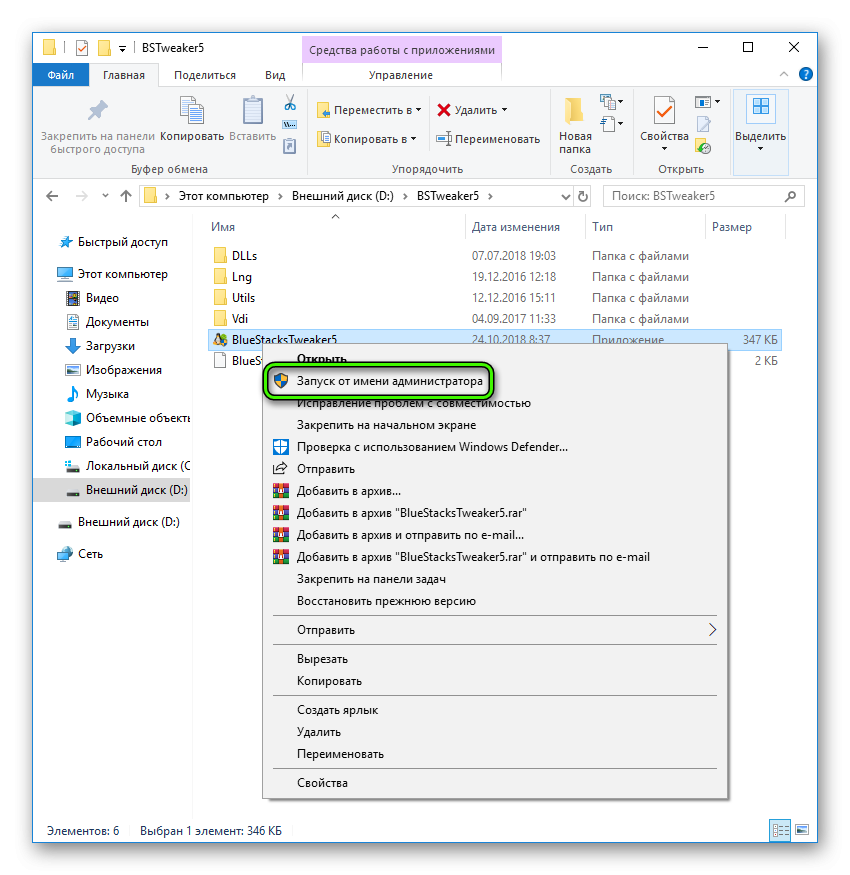 Otherwise, a critical error will occur when configuring the utility. Now click on the item Force Kill BS from the main tab. Now go to Helpers. Here click LMB on the big button Unlock.
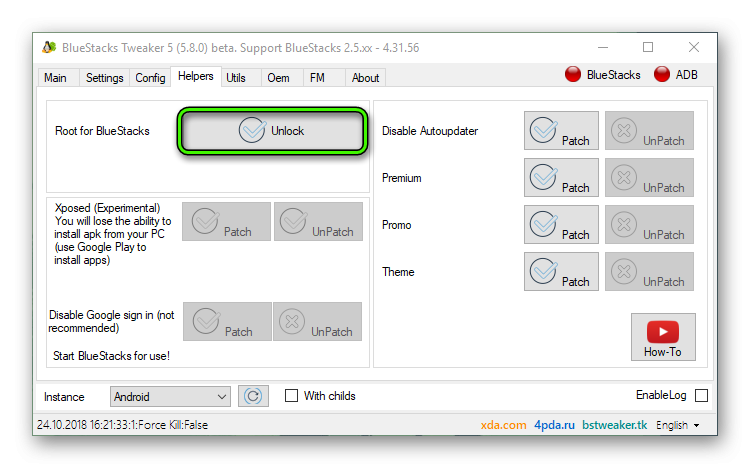 The next step is to start BlueStacks without closing the utility. Next, go back to her window and click on Patch.
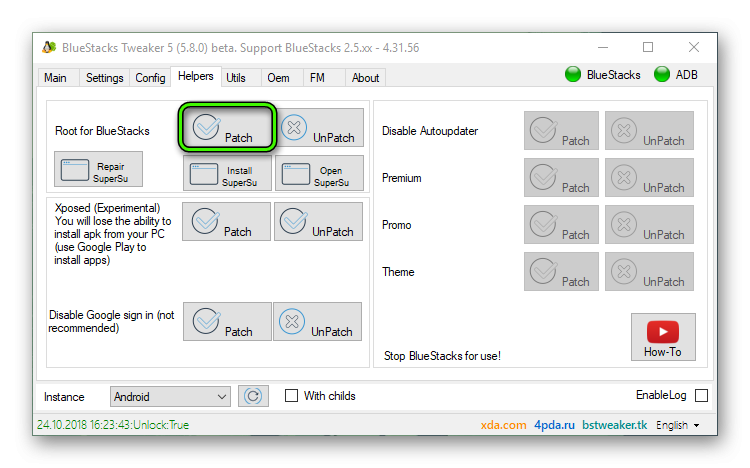 Now select the option Install SuperSu followed by Open SuperSu. This will install the super user rights management app on the Android system and launch it.
In the emulator window, click on Expert.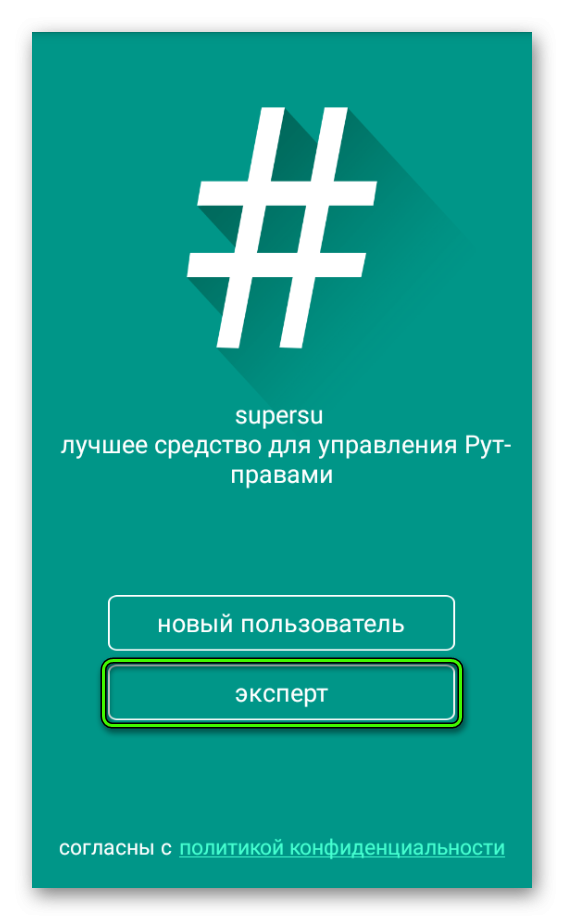 Next, update the binary by tapping on the appropriate option and select “Normal”.
 It remains only to wait for the installation to complete. At the end, click “Restart”.
Note
At the time of this writing (as of the end of October 2018), BSTweaker 5.80 has been released. It manages to root BlueStacks 2-4, but only up to version 4.31.56 and from 2.5xx. The tweaker is not compatible with later or earlier editions of the emulator. Find out its version will be as follows:
- At the top of the program window there are several buttons. Among them there is a “gear”, click on it.
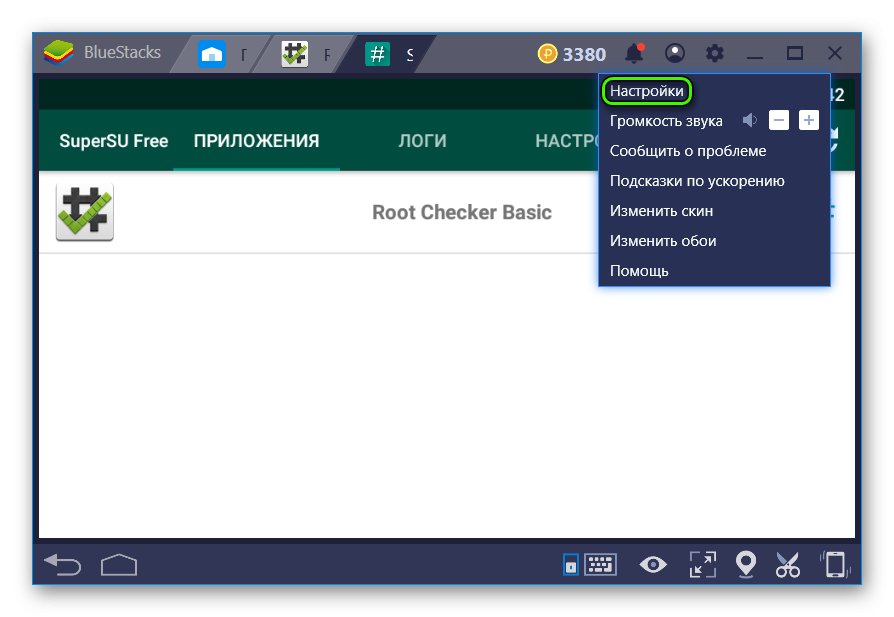
- Now go to the options menu.
- Open theAbout tab.
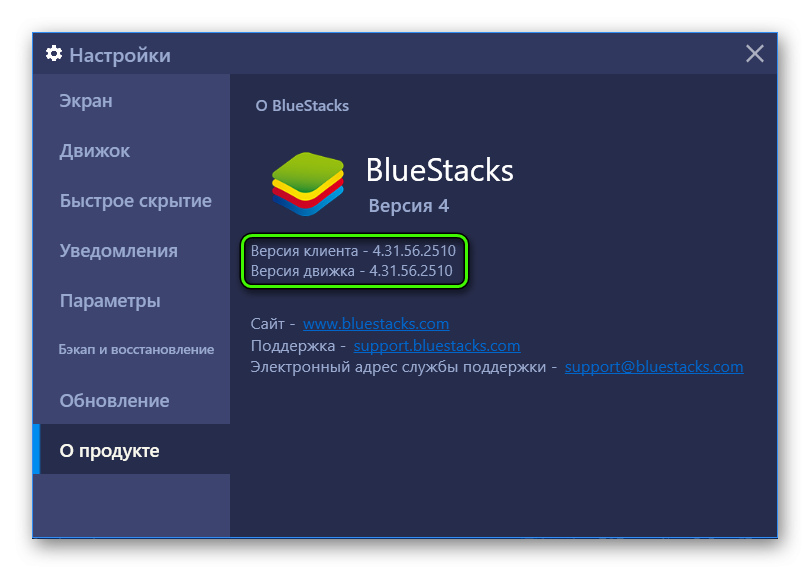
- Here you will find the information you need.


Спасибо вам огромное! Отличная инструкция,всё получилось!
У меня не появляется кнопка Unlock что делать
Не появилась кнопка значит у тебя старая версия Bluestacks, скачай новую и опять попробуй.
У меня последняя версия блю стакс и последняя версия приложения! Кнопки унлок нет!
Всё получилось. У кого нет унлок Заходите в раздел Root сверху в программе, там всё есть!
Не все могут посмотреть на 5см в сторону