Each user seeks to improve the performance of gaming applications, because his success in the virtual field depends on this. One way to achieve what you want is to connect an integrated accelerator. Today we will talk about how to enable hardware virtualization in BlueStacks.
Instructions
There are several ways to improve performance in gaming applications. This cannot be done directly from the emulator settings, you will have to go to parametersBIOS. We will look at an example procedure using the Windows 10 desktop platform. If you know a more convenient option, then use it. Step-by-step instructions are presented below:
- Open the shutdown menu in Start.
- With the Shift key pressed, click on “Reboot”.
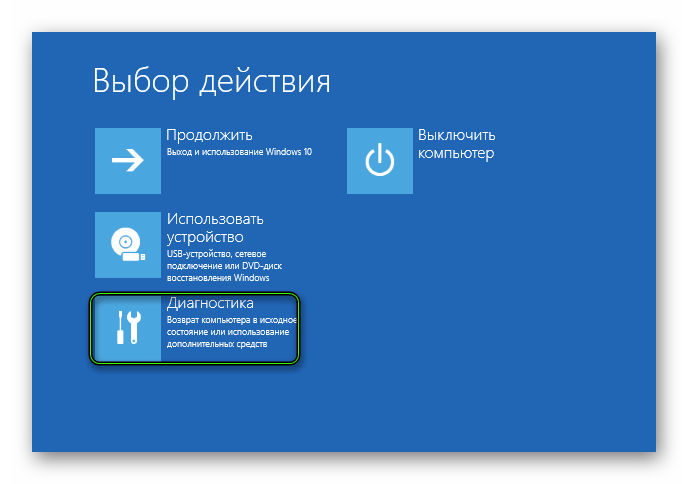
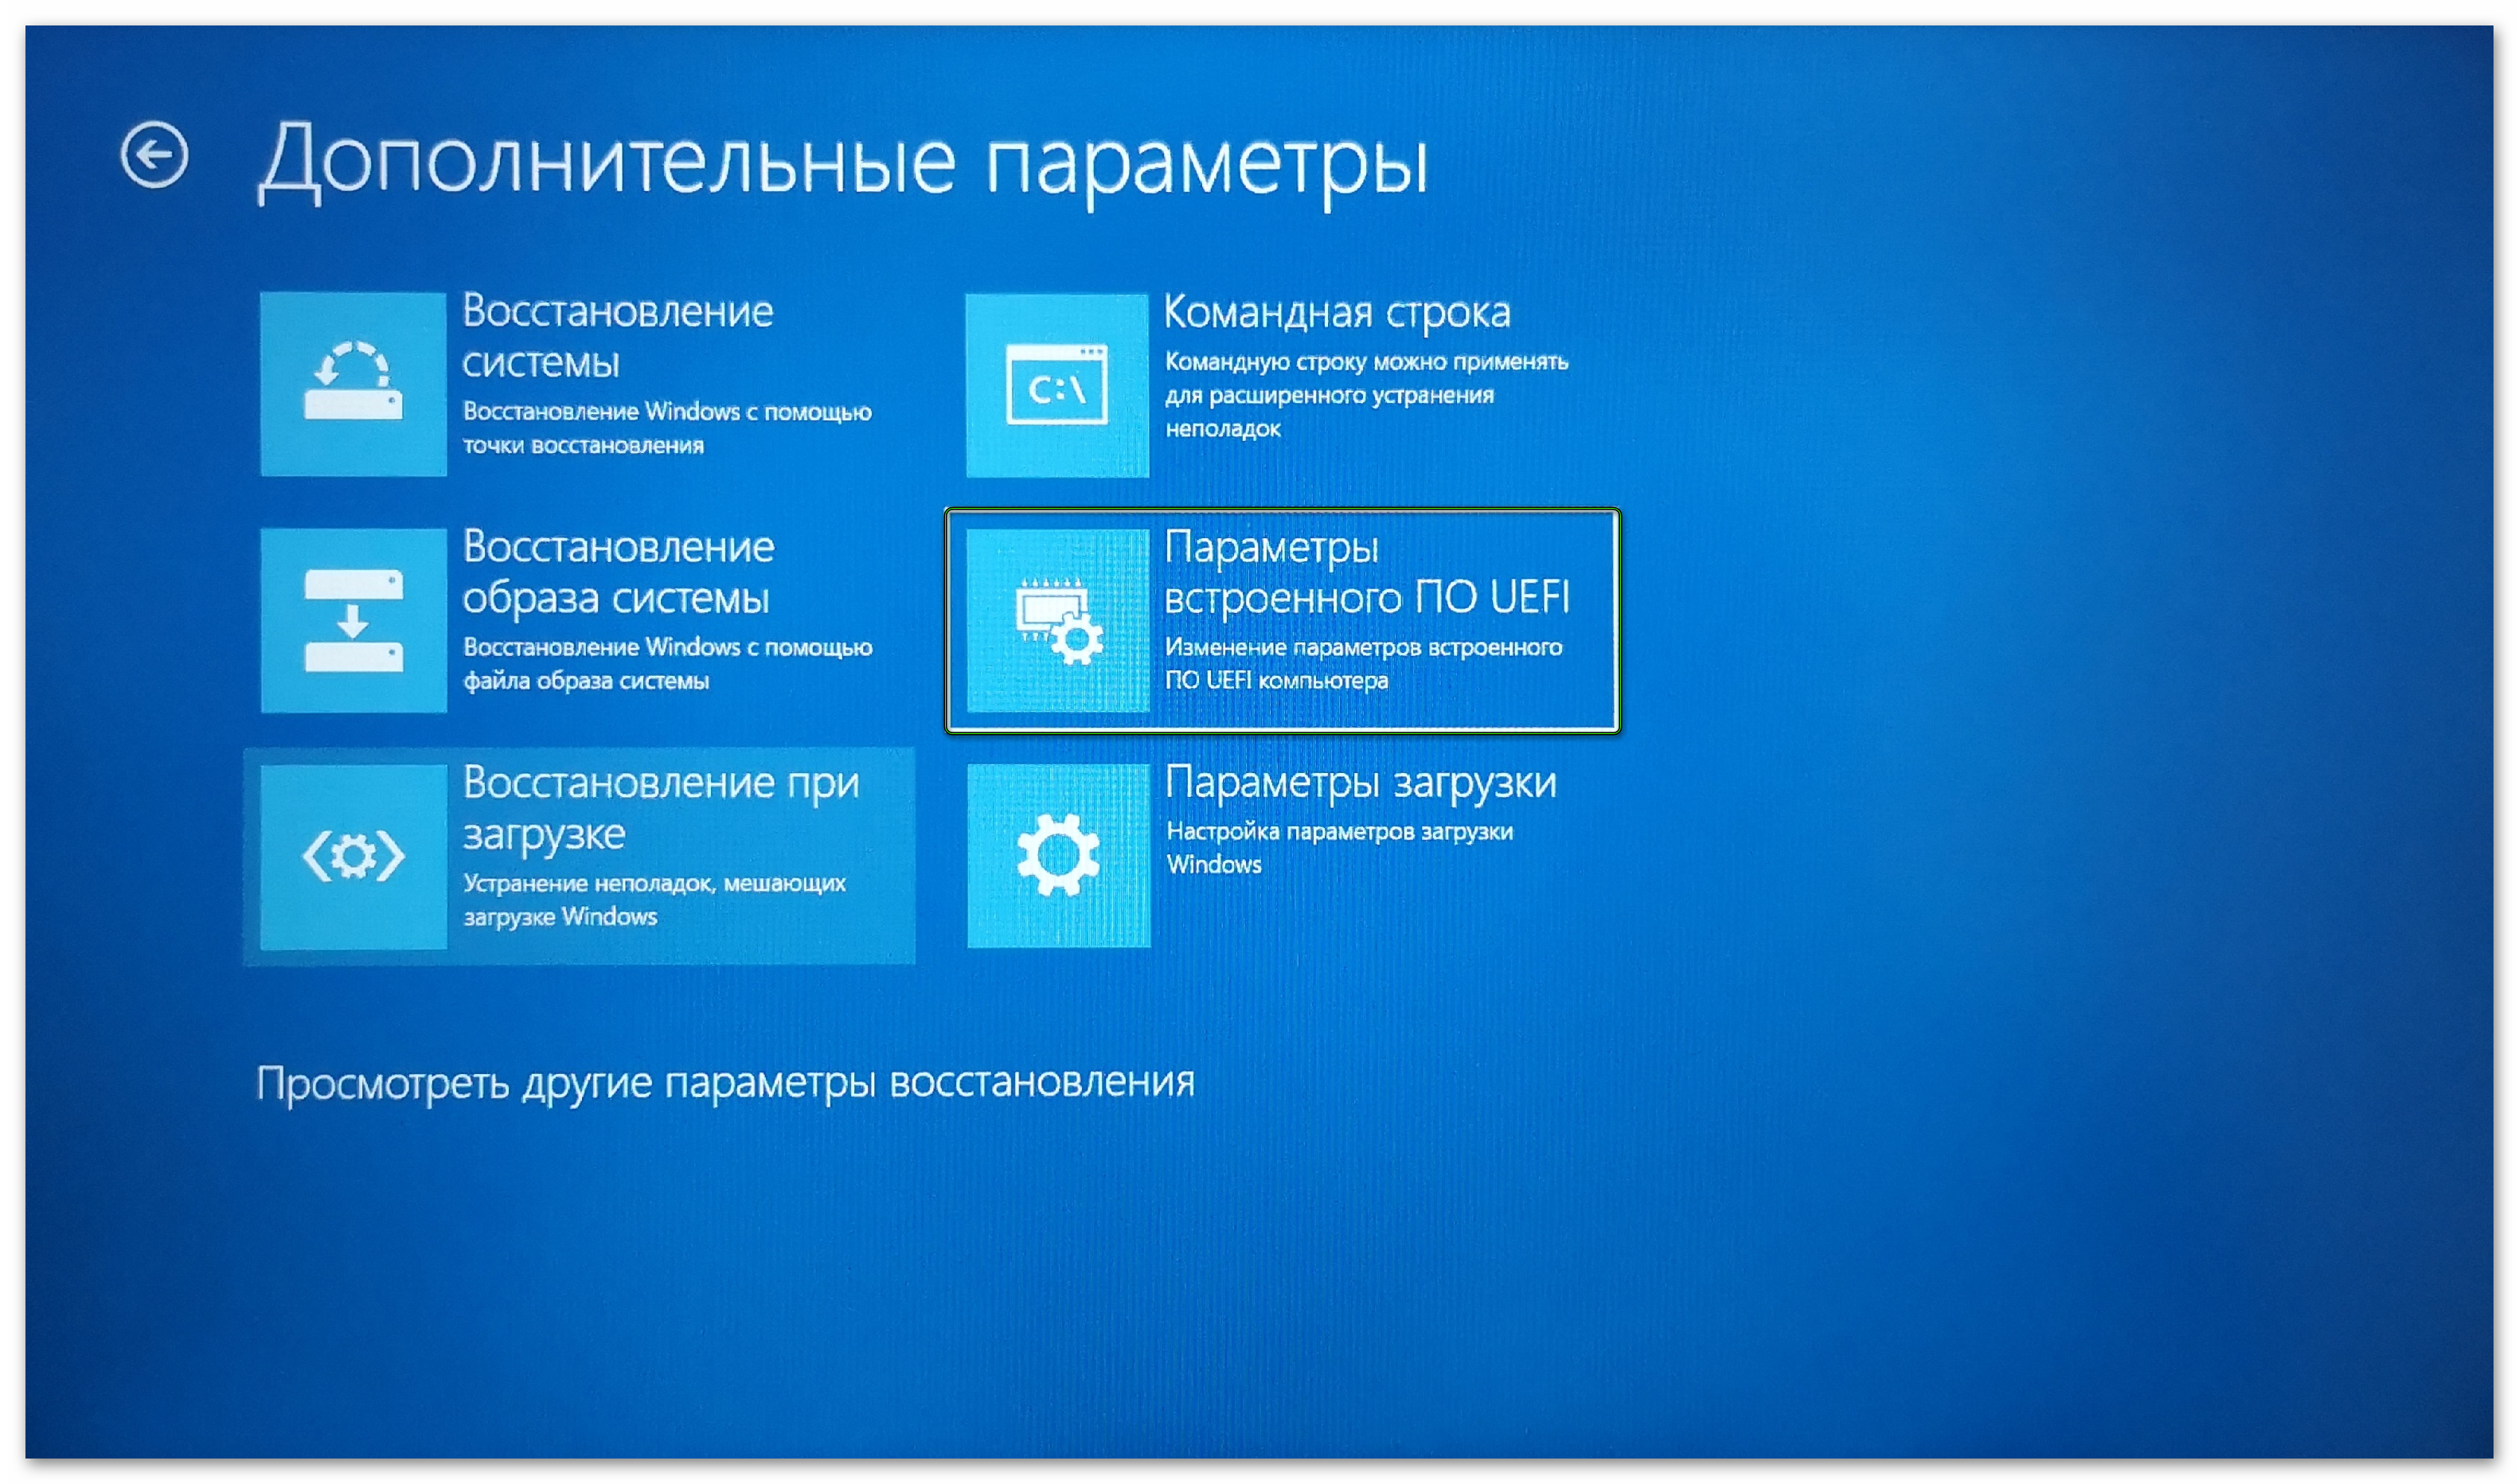
- In the new window, select the “Diagnostics” parameter, and then “More options”.

- Confirm the seriousness of intentions and go in the BIOS settings menu by rebooting the system.

- In the standard interface, find the item “Virtualization Technology” and set its value to Enabled.
- Save the changes.
Summing up
Hardware virtualization speeds up gaming applications BlueStacks is a great opportunity to increase the performance of a stationary platform.


