Questions like “Where are the BlueStacks files stored on the computer?” regularly arise from interested users of this Android emulator. Indeed, in some cases, their transfer between a virtual system and a computer / laptop will be extremely useful. Let’s deal with this topic in more detail.
Instructions
At the moment, the fourth version of the emulator is relevant. But still, many users decided not to upgrade and stayed on the third BlueStacks. For this reason, we will consider the location and transfer of any documents for both cases.
Third version
The import tool is originally present in BlueStacks 3. To open it, do the following:
- Open the System Applications directory from the home screen.
- Then click on the icon that says “Settings”.
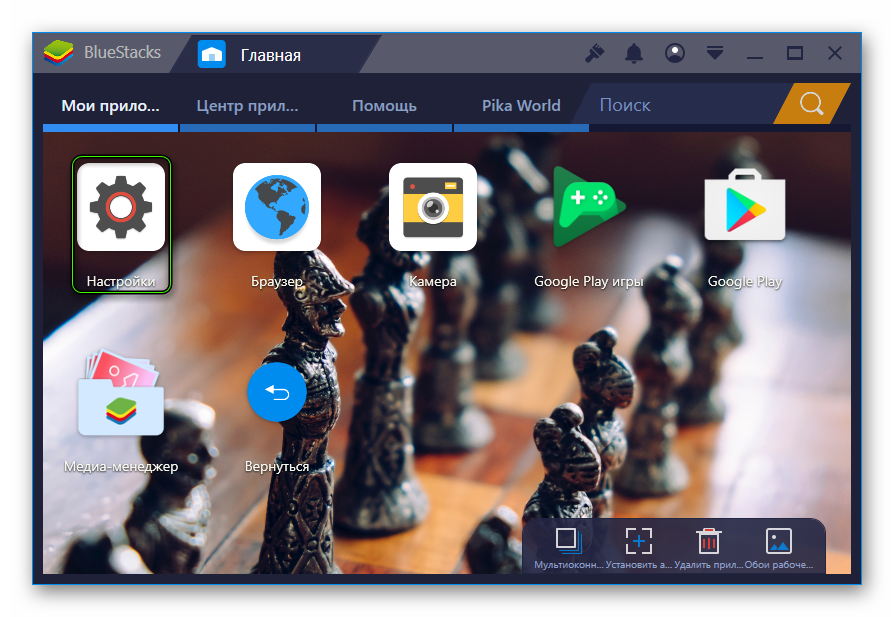
- Scroll to the bottom of the options menu.
- Click on the appropriate item here.
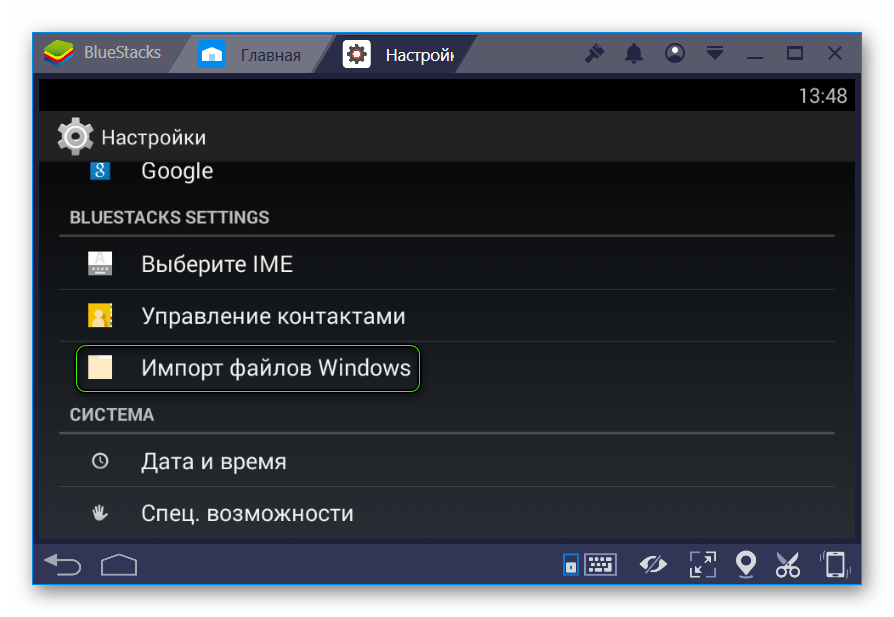
- It remains to select any file, for example, a video clip, through Windows Explorer and import to your virtual device.
But in the opposite direction, unfortunately, this function is not available here. But, most likely, you will never need it.
Fourth BlueStacks
And here everything is about the same, because the program also has a tool for transferring any documents between virtual device and computer. But in this case, it has been significantly improved. Calling the function will exit as follows:
- Open the emulator.
- Go to the Home tab.
- Click on the icons shown in the screenshot to launch the Media Manager application.

Here we are interested in the items “Import …” and “Export …”. The second one is responsible for transferring files from BlueStacks to a computer. And the first one performs the reverse operation. Suppose you want to send a music track to Android memory. The procedure is performed as follows:
-
- Open Media Manager as suggested above.
- Click on “Import from Windows».

- Specify the path to the audio file in Explorer and press “Open”.
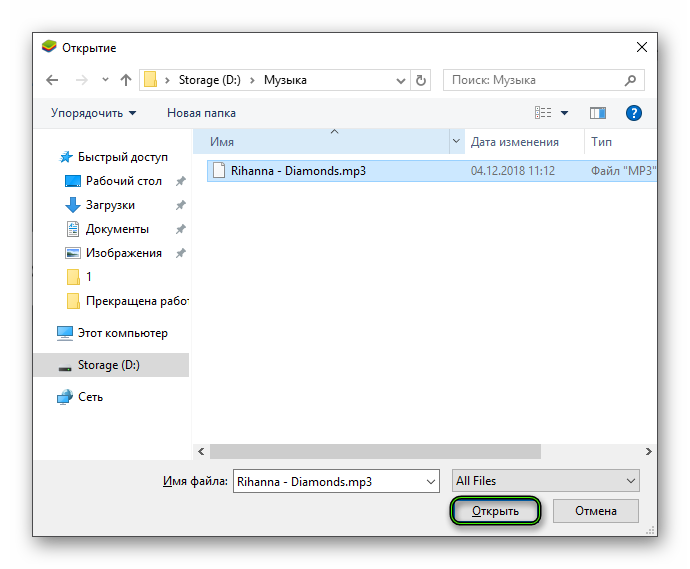
- Waiting for copying to finish.


Спасибо,выручили,а-то не мог послать фотографию.
благодарю,за статью.Помогли.
спс.
Неужели нельзя сделать просто хранилище куда можно закинуть файлы я с книгами задолбался просто
Я так family link сломать собираюсь: скачать его в блю стакс, скинуть в винду, открыть в блокноте, изучить, удалить функцию блокировки/сделать её без возможности настройки, заменить оригинал на подавлённую программу в телефоне, перезагрузить его и наслаждаться безграничным использованием
спс очень помогло, по четверки, дико глупо и неудобно все расположено, час сидел ): было нужно важный видео файл по работе забрать.